Order Today
Ships Tomorrow
Order by 5PM EST
Custom Clear Car Decals


Template Categories
Popular Templates


About Our Clear Car Decals
Description
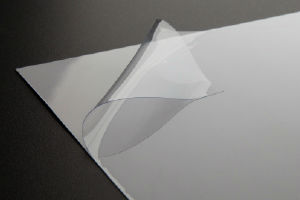
Use clear car decals to add personalized graphics to your vehicle's windows without blocking the view. Because they are made from transparent adhesive film and are see-through from both sides, these vinyl decals are a great way to achieve full window coverage safely and easily. Advertise your business or add custom decals to your personal vehicle with ease.
Installation & Care
Installation: For full window coverage, order your decals 1 inch wider and taller than the window to allow for trimming. Before installing, premark the desired position with a removable marker. Remove the decal backing and coat the adhesive sides and the window with soapy water. Realign the decals to your marks and press them onto the window. Use a rubber-tipped squeegee, starting from the middle and working your way out, to remove bubbles and excess water. Allow your decals to dry before driving.
Care: Like all vehicle window decals, wash your clear decals regularly to maintain appearance and longevity. These decals are safe for most car washes. However, do not apply high pressure wash for long periods of time to avoid corner peeling. To remove the decal, simply peel back a corner using a razor blade and then pull the remaining decal away from the window. You can also use the razor blade to remove any remaining adhesive residue.
Clear Car Decal Highlights
Weight: .09lbs per square foot (about the weight of 9 quarters)
Thickness: .2 mm (about the thickness of 2 sheets of copy paper)
Details: Transparent, semi-permanent, easy to install, removable
Uses: Indoor/Outdoor. Vehicle windows, business advertising
Print Method: Four color process, eco-friendly, weather, fade and abrasion resistant UV ink
Estimated Lifespan: 5+ years with proper installation and care
Common Sizes: 6"x6", 12"x12", 24"x12", 36"x12", measure to cut
Clear Car Decal Options
-
Print Surface

-
White Ink

Image Gallery
- src=https://www.esp.com/content/assets/filelibrary/20150928-130454-486.jpg
Video Gallery
- MB3spF920Qo::Installation
Frequently Asked Questions
Product Specs
- What material is your clear car decal made out of?
- Our clear car decals are made from a 2.0 mil super clear polyester. This thin vinyl material is durable for use on a car yet thin enough to be aesthetically pleasing no matter the placement or size of your decal.
- How do I know where my decal will be clear?
-
Clear is indicated by the gray and white checkered area on our site. If you want any part of your acrylic sign to be clear, that background must be visible on your proof. To get that checkered area, simply go to the color panel and select “Clear” while you have your whole sign (or the object you want clear) selected. If you have uploaded a JPG file to the site with a white background, we will print the white of that background. If you want that to be clear instead, please upload a PNG with transparency or a vector file with transparency.
Your car decal is made from a clear vinyl material. Thus, anywhere where your graphic isn’t showing and the checkered background is visible will be clear. So the portion of your decal that will be see through will largely depend on what you are printing. For those seeking to print over the entire surface area and yet retain visibility we recommend our perforated window decals. These decals offer one way visibility regardless of how much of the surface area is printed. Please keep this in mind when using clear car decals that have the contain a design that covers the entire surface area.
- Do you offer other types of car or vehicle decals?
- We offer two other types of car decals. Perforated car decals, as alluded to above, offer one way visibility and are the ideal car decal for a decal that will cover an entire window. These are most often used for rear window decals. Opaque vehicle decals are completely opaque regardless of what is printed on them due to the opaque nature of the vinyl itself. These are best used in situations where visibility is not a primary concern, such as the sides of vehicles rather than on the windows. More information for both of these types of decals are found by clicking on the links within this paragraph.
- Are vinyl car decals the same thing as car stickers or car graphics?
-
Generally speaking the phrase car decals can be exchanged with car stickers or car graphics. All of these are usually semi-permanent graphics that can be placed on a wide variety of vehicles including trucks, boats, cars, tractors and more. Regardless of what you refer to them as, you should keep at least two things in mind:
First, car decals are a semi-permanent car signage solution. This means that once applied you will not be able to remove them and reposition them. Applying and removing them should not cause damage to your vehicle but you will not be able to remove them and then apply them in a different spot or on another vehicle. The adhesive will be ruined and the decal itself will not look good if you try to use it a second time. For a temporary vehicle signage solution that can be applied and removed as many times as you might need, visit our car magnets page.
Secondly, all of our decals (clear, opaque and perforated) are a different product from what is known as vinyl lettering. This means that the decals will come in one continuous piece with your decal printed on it. Even a design featuring a word will have a backing to it. These can be cut to shape as explained below, but we do not recommend attempting to cut out individual letters. If you are looking for car decals that feature individual letters or designs please contact us about our vinyl lettering product offering.
- How thick are your window decals?
- The thickness of our car decals is minimal 2 Mil or .002 inches. This is thick enough to adhere to your car window or car for an extended period but not so thick that it ruins the look of the decal or vehicle itself.
- What is the lifespan of your clear window decals?
- The lifespan of the clear car decal can be 5+ years with proper installation and maintenance. Though any car decal’s lifespan will vary greatly based on usage. Decals that are on vehicles driven in kinder climates inevitably will last longer than those exposed to harsh climates for extended periods.
- Will the exposure to sun or the elements ruin my decal?
- Our car decals are intended to be used on a vehicle that is driven and used in any climate. We print with a UV resistant ink that should protect your decal from any sun damage over time. Similarly, while there will be variability in the lifespan of your decal based off the climate it is used in, it should last for several years and withstand even the harshest of climates.
- Can the decals be cut to shape? Individual letters?
-
As explained above, if you are looking for individual letters or designs then please contact us about our vinyl lettering product offering.
Otherwise, we offer both halo and contour cut options. These cut options for your car decal are slightly different. Contour cut means that your design will be cut to the exact shape of your design. Halo cut will be cut to the exact shape of your design but leave a small border around the entire perimeter of your decal. Either of these options can be selected while designing your decal on our design tool.
- How small or big can my window decal be?
- Your car decal cannot be any smaller than 6”x6”. Decals smaller than this are not possible due to the industrial size of our printers. For larger decals at least one dimension must be under 52”. Assuming that one dimension is under 52” you are allowed to go up to 1798” or nearly 150’ for your other dimension!
- What if my decal has more than 2 colors? Will it cost more?
- All of our signage is printed in full color. Thus, regardless of how many colors your design uses, or even how complex or intricate the design might be, your design will not impact the cost of your sign. Factors that may impact the cost of your car decal include any options selected, quantity, and applicable shipping and/or taxes.
- Will your car decals only work on cars?
- No. Our vinyl car decals will actually work on a wide variety of vehicles. Whether it is a car, truck, motorcycle, boat, tractor, forklift or something else you should be able to use the decal. The important thing to keep in mind is that the surface needs to be clean and nonporous for the decal to work. Also, for tractors, forklifts and other manufacturing settings we also offer a high adhesive decal. This decal has a much stronger adhesive and should be used only for permanent uses.
Usage
- Will the decal damage or ruin my window? What about my car?
- Your decal can either be placed on a window or on the car or vehicle itself. In both cases the actual decal will not damage your window nor the surface or paint job of the car. The only exceptions to this are fading and removal. If your decal is in the exact same spot on your car for many years then undoubtedly the paint under the decal will be less faded then the rest of your car. The second is damage that may occur during removal of the decal. If you choose to use a sharp edge of some sort to help peel away the decal you need to be careful not to chip, scratch or remove the actual paint of the car. Please see the section on removal on how to avoid this kind of damage.
- What are clear window decals typically used for?
- Car decals can literally be used for any business that wants to have a mobile advertising option. Though the most common examples of car decals are used by those who visit the customer rather than having the customer visit them. For example, tradesmen such as plumbers, electricians, landscapers, contractors and more are a great example of this. Catering companies and other delivery driven companies also often use car decals. Individuals and sole proprietors that have home based businesses or work on their own, such as realtors, photographers, etc, also frequently use decals to spread the word about their services or website. Lastly, company fleets are almost always adorned with car decals for branding purposes. No matter what type of business it is, car decals can be an extremely effective advertising solution for a car or vehicle that is going to be highly visible regardless of whether a decal is used or not.
- Will the decal impact the transparency of my windows and my ability to drive?
- It definitely can. As briefly explained above it is absolutely critical that you choose the proper type of decal for your vehicle. Clear decals are printed on a clear material. Thus, if you were to order a blank piece of the clear material, visibility would not be an issue. But if you were to order a decal that was printed solid black there would be very little to no visibility through that decal if it were placed on a window. Wherever your decal is printed it will not be transparent. Thus, clear car decals are best used for smaller designs or when your design doesn’t take up the majority of the sign. For decals that are larger or need to go on the windows that require visibility, please visit our perforated vehicle decals product offering. These decals offer one way visibility that will not obstruct your ability to drive safely.
- Can I place my decal on the inside of my car or vehicle window and have it be visible to those outside?
-
Yes, just like our normal window decals you are able to place your clear car decal on the inside of your window and have it be visible to someone outside your car if you select the “inside glass” option.
For clear car decals this is absolutely an option. If you’d like to position your car decal on the inside of your window to be seen by passersby, then simply select the “Inside Glass” option during the designing and ordering process. The decal will then have the adhesive on the opposite side and you can place it on the inside of your window. However, please be aware that most cars have tinted windows which may severely obstruct the visibility of your sign. The best test is to print out your graphic on a piece of paper and tape it to the inside of your car. If you can see it clearly, then the “inside glass” option should work for you.
- Can the decal be used only on a glass surface?
- Your clear car decal can be used both on a glass surface and on your vehicle itself. Generally speaking the determinant isn’t whether it is a car or not but rather what kind of surface it is. Smooth, nonporous surfaces will be compatible with your decal. This simply means that they are a solid surface that doesn’t allow air or liquids to enter through them (like a screen door). Surfaces which are unsmooth and/or porous will cause the adhesive to not stick properly when applied and/or weaken the decals hold over time.
Installation & Care
- Does my decal have a backing? How do I remove it?
- Yes. Your decal will adhere to your car’s surface or window with adhesive. The adhesive side of your decal (will depend on whether you select Inside Glass or not) will be protected by an extremely thin backing. Once this backing is removed you will be ready to install your car decal. If the backing is proving difficult to remove, simply place a piece of scotch tape halfway on the sign and then use the tape to slowly peel away the backing.
- How do I install my clear window decal?
-
Before you do any installation it is best to clean the surface where the decal will be applied and let it air dry. The dirt and grime that is removed will ensure that the adhesive sticks better when applied.
Before installing your decal you may want to mark the location you want to place it on the window or car with in a non-permanent way.
After removing the backing protecting the adhesive side of the decal use a spray bottle consisting of water and a drop or two of mild detergent or soap to wet the adhesive side of the decal itself as well as the surface where it will be applied. The water in these two locations will give you the ability to reposition the decal before it is fully adhered to the surface. For example, you should gently peel the decal away from the surface to remove extremely large air pockets or bubbles as it is applied.
Once the decal is placed correctly use a squeegee or other flat surface to carefully remove any small or minor air bubbles or pockets and excess water that may remain. The only caution in using a sharp edge is to be careful not to scratch or damage the car or surface itself.
Once the water has dried completely the decal’s adhesive will set in and the installation is done.
- Does installation require more than one person?
-
Smaller decals are easily installed by one person. We recommend reading the instructions fully before removing the backing so that the surface is clean and the spray bottle is prepared. Otherwise, small decals are not difficult to install by yourself.
Larger decals (anything over 18” or 24” in any given dimension) are much easier to install with 2 or more people. This makes it much easier to prevent the decal from sticking to itself, placing the decal and removing any air bubble or pockets as it is initially applied.
- How do I store my decal?
- Prior to installation your decal can be stored at room temperature. Store it flat or roll it when necessary. It should not be folded or have heavy objects placed on it if it is rolled. Post-installation you will not have the need to store your decal since it is for semi-permanent use and cannot be repositioned and reused once installed.
- How do I clean my decal?
- You can and should regularly clean your decal by gently wiping the surface of the decal with a damp non-abrasive cloth. This will remove any dirt or grime buildup and help it to remain vibrant and clear.
- How do I remove my decal? Will it leave behind a huge mess and lots of residue?
- Most decals should peel away easily from your vehicle or window. For decals that have been in place for an extended period or in extreme temperatures we recommend using heat to warm up the decal. Parking in the sunlight or even a regular blow dryer can achieve this. This will make peeling it away easier. A sharp edge can be used to peel away difficult to remove decals. Be careful not to scratch or damage the surface where it is applied if you use a sharp edge such as a razor to help with removal. Any residual adhesive can be removed with gentle scrubbing with a non-abrasive rag and a cleaner that is suitable for your car.
- Can I wash my window or car with the decal installed?
- Yes. Washing your car is perfectly fine with two exceptions. Power washers that can be purchased and used at home should be avoided. Also, actual car washes should be avoided. The force of both of these ways of washing your car can be powerful enough to either wash away the decal or weaken the decal to the point of it falling off in the future.
Your trusted, custom signage provider.


